Quilt ADD in therapy

My photo
Colorado, United States
Other than my family, the passion of my life is quilting. An eclectic, I love a wide variety of styles and techniques encompassing both machine and hand work. I am a longarm quilter who can work for you. I enjoy any style, from pantographs to all-over to full custom, ranging from traditional to modern. I love bringing vintage tops to life and am willing to work with a challenging quilt top. Instagram: lyncc_quilts

Tuesday, March 31, 2015

Finish Report! ~ "Fireflies in the Meadow"

I am so excited about this quilt, you guys. :D


This is almost a direct copy of Katie's quilt. When I saw her top, I was completely smitten, and not only did she not mind if I made one, too, she sent me a link of where to find the fabric. The fantastic fabric is from the collection "Wee Wander" by Sarah Jane, and I got it at Hawthorne Threads online. 

This was quilted with my desktop Viking Sapphire. And what else could I use for this quilt, but glow-in-the-dark thread?? It's FANTASTIC! I was quite surprised at how nicely it shows up at night. (I'm still trying to figure out how to get the camera to show that to you.)

I put in a large-scale meander on the center portion, wanting to keep this super snuggly. It's very difficult to keep that nicely spaced on a table-top machine, so I put in some wandering lines with water-soluble markers and white ceramic pencil on the darker blue rows. Here and there, I drew in a firefly.


The border fabric is nothing short of wonderful with the fun scenes of children hunting fireflies at dusk, and brings back memories of magical times playing in clouds of these intriguing insects during childhood trips to my cousins' in Pennsylvania and Aunt in New Jersey, as well as my own children's gleeful amazement running around with jars in hand at Grandma's in Nebraska. We've never lived where they flourish, so it's a rare treat in our own lives. 


The grass and children were quilted with the glow-in-the-dark thread, but I switched to matching blues of 50wt Aurifil for the outer border. Wanting to keep with the more-open scale of the inside, I simply followed logical lines through the different bush and tree areas, and did what I call a "lazy evening air" meander in the sky.

Before I got there, though, I did the kids and the grass. This is what the first pass created:


Isn't she adorable??  You can see that the line of grass is quilted much denser than the rest of the quilt. It didn't look bad at all like this, but it *did* make a collapsing point around the quilt in the narrow gap between the grass and the ditch-stitching around the center. So I made one last pass to put in a line of clover, mushrooms, and fern buds in that gap:


That solved the problem very nicely, and didn't make an unsightly pull in the quilt like I worried before I started that extra fill. I think that's because the outer and inner scales balance each other, and the flannel backing I used gives it enough "oomph" on either side. It was just that narrow fenced-in band that had a problem.

By the way - here's that backing. Isn't it perfect for this quilt?? It's from the Riley Blake "Oh Boy" collection.And those horses are probably my favorite part of the quilt. No, the border is. No, the horses are. . .   ;D (And why are these photos dropping the Lightbox "fixing" I did so you'd see the colors just right? Everything looks a little muddy. It's not at all in real life! That's a beautiful almost-mint green in that flannel.)


I ended up deciding to do something to make my copy a little different from Katie's, so I off-set the picture blocks. The frames, as well as the main binding color, came from the center portion of the double-edged border fabric. Love the fussy cut vignettes!


I used the faux piped binding method on this quilt, more so that I could do it all by machine than for a design decision, but it looks great.


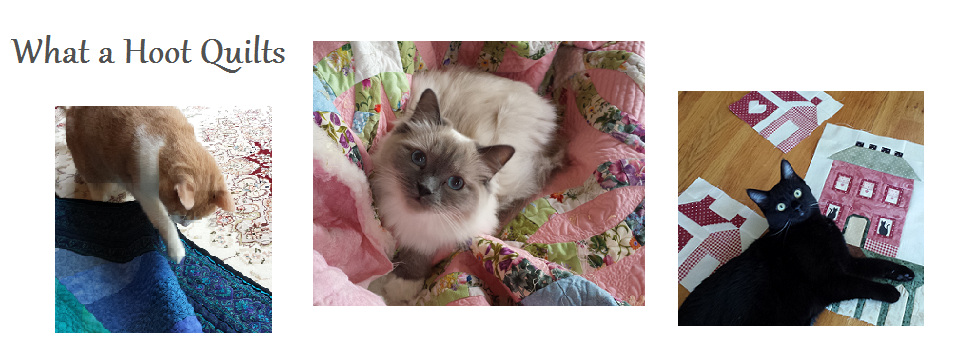
Trimming the edges to do that was a bit of an adventure, though. I had two "helpers" that Would. Not. stop diving into it! (And here you see the colors properly.)


2015 FAL at On the Windy Side
This quilt was on my Q1 goal sheet for the 2015 Finish Along. It was also my March goal for A Lovely Year of finishes, and it's a WONDER that I got it finished in time with all the wedding prep flooding us right now. 


I made the top last August. The meadow behind the house was so lush at that time from the summer's record rainfall!


One last look at it finished:


Quilt Stats:
"Fireflies in the Meadow"
              70.5 x 78.5 inches

100% cotton fabrics from the Sarah Jane "Wee Wander" collection
Backing: whole-piece 100% cotton flannel from the Riley Blake "Oh Boy" collection
Batting: Hobbs 80/20 Cotton/Poly Heirloom batting
Design adapted from Katie Mae Quilts "Catching Fire(flies)" quilt
All construction and table-top free-motion quilting done by Lynette Caulkins
Pieced August 2014, Quilted March 2015 in Monument, Colorado


~*~*~*~*~
Linking up at:


Can I get a Whoop! Whoop!


TGIFF, which is at Quokka Quilts this week
 (main site here)
   

Sunday, March 29, 2015

Envelope Liners Tutorial (BOMs Away Alt-Activity)


Welcome to the Link-Up for BOMs Away Mondays! 
We'd love to see the BOM you're working on lately. 
This week's link-up is at the bottom of the post.


Wow!  Having a bride in the household really steals away all your time!  ;D  Yet again, I have zero BOM work to share (although the link *is* posted at the bottom of this post.) But I have a tutorial for you that might be handy for a number of situations.

We have unique invitation needs and a tight budget, so we've been making those. They're turning out really neat. Devon wanted Marines Red envelopes, which we found at a great sale price at Hobby Lobby. But they need a little more something for wedding announcements. We're lining them with pretty gold papers. Quilter's tools are Most Excellent for this project!  Here's how it's done:

Our envelopes are the standard U.S. A2 size, which measure 5-3/4 by 4-3/8 inches. They have a straight flap. 

First, find your paper. Card stock isn't a great choice. We wanted to get some thin metallic gold, which we could order online in packs of printable sheets, but we have time issues, so we had to go with the little-bit heavier craft paper we found at the Michael's in the city. Which is actually turning out quite well! You can get 4 liners for this size from each 12x12 sheet of paper.

First, use your mat, rulers, and an older rotary blade to cut the paper into sections that are 5-1/2" by 5-7/8":  [But please note: Our liners cover most of the glue line on the flap. We felt it looks nicer, and as we're sealing the envelopes with gold roses instead of licking the glue, we're not losing "closeability" by doing so in this particular situation. If you want to use the gummed line on your envelope, cut your liner into a 5-1/2" square.]


The slightly longer side is your vertical (unless you went with the square), so pay attention to that in this next step, which is to score your flap fold line. If you don't, your liner will have an ugly, bumpy fold when you close the envelope. To do this, lay your ruler with the bottom of the liner at 4-1/4 + 1/16th on your ruler. A little weird, I know, but you can do it.  :D  


Use something thin, but not sharp, to run the score line: I found that the round end of a paperclip works perfectly! If you don't have one on hand, try the dull backside of a non-pointed dinner knife (NOT a steak knife).  - Don't fold it just yet, though.


Next you want to trim the angles on the edges of the flap portion. For our envelopes, it works perfectly to slant the ruler in just 1/8th inch at the top, to meet the edge down where the score line is. (The score line is running left-to-right in this photo's orientation.) Can you see that super-thin triangular bit I'll cut off? It's not much, but makes the look professional. Check your flap on your ruler to see what kind of slant you need for yours.


Now fold your liner's flap, right sides together:


Apply a short piece of double-sided tape to each flap corner. It is not necessary to use more, and you want the in-the-envelope part to be free to slide as the finished flap is opened an closedd. (You can use glue, but then you have to deal with warping papers and probably need to lay things under books for a while.):


Slip the liner into the envelope, and make sure it's centered side-to-side:


Fold down the liner flap,


Then fold down the envelope flap, making sure it closes nicely, and press the taped areas firmly:


And, Voila!  You have a beautifully lined envelope!


But back to quilting: If you're here for the link-up:

~*~*~*~*~
Did any of you guys get some work done on your BOMs?


Sunday, March 22, 2015

BOMs Away - The Stalled Edition


Welcome to the Link-Up for BOMs Away Mondays! 
We'd love to see the BOM you're working on lately. 
This week's link-up is at the bottom of the post.


Have you guys done any work on BOMs this week? This made week 2 in a row for me of no progress in that arena. My day was filled with a little family fun and a lot of wedding planning/action-start-up. Part of that wedding action was actually some quilting, but not BOM work. I really need "Fireflies in the Meadow" off my FMQ station and my basting pins freed up. So I worked on that. 


These pics are actually from yesterday, when I was finishing the work with the glow-in-the-dark thread. I ***love*** this fabric collection! And I'm so happy with how the quilt has been turning out. The glow-in-the-dark thread is AWESOME, although it's almost as fussy as metallics to quilt with. The center and the border are both more-openly quilted, and after I put in the grass, I wasn't happy with the caving-in of the band between it and the ditched edge of the center. So I went around a second time making clover, mushrooms, and fern buds. Very fun, and looks terrific in the dark!


Today I got going on the outer foot of the border. It's just over half finished, so tomorrow I should be breaking the machine back down to put on the binding. And then I'll have to figure out what to use as a cover project for Top Secret  - oh! My "Garden Friends" BOM will work fine. It, too, needs applique stitching, so the machine will be in the right mode. 

~*~*~*~*~
Share with us if you got some work done on your BOMs!


Monday, March 16, 2015

BOMs Away - Go get 'em, Kyle!


Welcome to the Link-Up for BOMs Away Mondays! 
We'd love to see the BOM you're working on lately. 
This week's link-up is at the bottom of the post.


I did zero quilting work yesterday, which means no BOM work here to report this week.

Instead, we spent the day celebrating Kyle's long-sought entrance to the Marines. Staff Sgt. Green picked him up in the evening to report for Basic Training. We won't see him for 13 weeks, and then it'll be a whirlwind wedding so they can use his post-Basic leave for some honeymooning before the rest of his initial training. So Devon will be mopey since she won't see him for a while, and I'm actually rather heartsick myself since he's now left our home for good (he's been living in our lower level for six months, which is a mother-in-law-to-be's dream, to be honest). 

Go smash it, Kyle - we know you'll succeed and look forward to greeting the better man you'll be on the other side! The Crucible? No problem! You got that when it comes!!


~*~*~*~*~
Did any of you guys get some work done on your BOMs?

Friday, March 13, 2015

Flimsy Alert! ~ Make that Two, thanks to Cabin Fever 2!!

Last week I had the best time at the Cabin Fever 2 retreat. It's the perfect event for me: A four-day bring-your-own-projects focus with little make-and-take demos each day in a stunningly beautiful luxury mountain cabin with no cell reception and hardly any wifi. . . Lots of work gets accomplished, I'm telling you!


How could we not love sewing it up at a location like this??  (stock photo from their rental site here:)


I don't have many photos, as I was MADLY SEWING on something that you won't see for some time. But the first thing I did was zip together the blocks for my "Boomerang" quilt. The pattern is by Emily of Crazy Old Ladies, and as she's one of the retreat organizers, she was on hand to help hold it up for the photo. Awesomeness  :D


The blocks had been made a good year ago, so I was excited to have the perfect excuse to pull them out even though this project was not on the current priority list. It didn't take too long to finish up, and then I hit the project that has true urgency right now. 

During the two and a half retreat days that I dedicated to Top Secret, I nibbled away on my adorable cookie, 


made this pocketed mug mat to keep my mug on, [There was a lot of fun swag, as well, from sponsors - coupons, I won a notions pouch and charm packs, and that orange baggy has the other two make-and-takes that I look forward to finishing during TV time: a new approach for a paper-pieced pin cushion, and a golf-tee based bobbin/thread connector.]


This other charm pack from swag was off playing with the Kona color card when I was snapping shots:


and this adorable clutch that Shannon prepped (SHOWER CURTAIN GROMMET for an inexpensive yet super cute closure!!! genius!):


and marveled at the creativity of folks who brought some fantastic gifts they'd made for everyone. I mean, check out this pin cushion below that Cheryl made for everyone! The weight of the wood frame base is wonderful when you want to move between your machine and a sofa for detailed pinning work.


And this thread catcher! Too clever!!! Seriously. (I need to find out who made these so I can credit her.)  They use a mini embroidery hoop inside the top rim and a circle of wood(?) at the base, and stand up like this with NO interfacing - 


- Until you want to pack things up, they twist and nestle into themselves so they take up hardly any space at all in your notions shoebox!


April even made these fun night masks for her roommies!:


Sometimes when I was up to do some pressing, I went "dumpster diving" in the trash cans near me to pull out scraps folks didn't want. I intend to start working on an Omigosh type quilt in a few months, so anything you can cut a square inch out of works. Patti was so amused at that concept, that she sent me box after she got home - I was expecting jumbled scraps, but it was full of charm and crumb packs she won't use! What fun!  :D


And after I finished all the work on Top Secret that I could do there, I snuck in some time on the last half day to start my Leaded Glass project. I only managed this much:


The pieces for this had been laid out at home before I left, and my two older daughters helped shift things around until we thought it worked nicely. The gathering up involved some meticulous organization, so instead of shelving this when I got home, it went straight to the work area. I've just finished putting it together today, so my work area is once again free for Top Secret and my cover projects. Isn't this pretty? It's a Tracey Jacobsen design that I tweaked just a smidge. 


I may or may not take the outer edges back off. I kind of liked it without the white border and lobes. Or maybe I'll border it in dark blue like the pool table's color. . . 


But it's going to be a long time before it gets a turn at quilting, so I have time to think about things.  :)